Peanut Butter Brownie Cookie Cups
Highlighted under: Weekend Baking Recipes
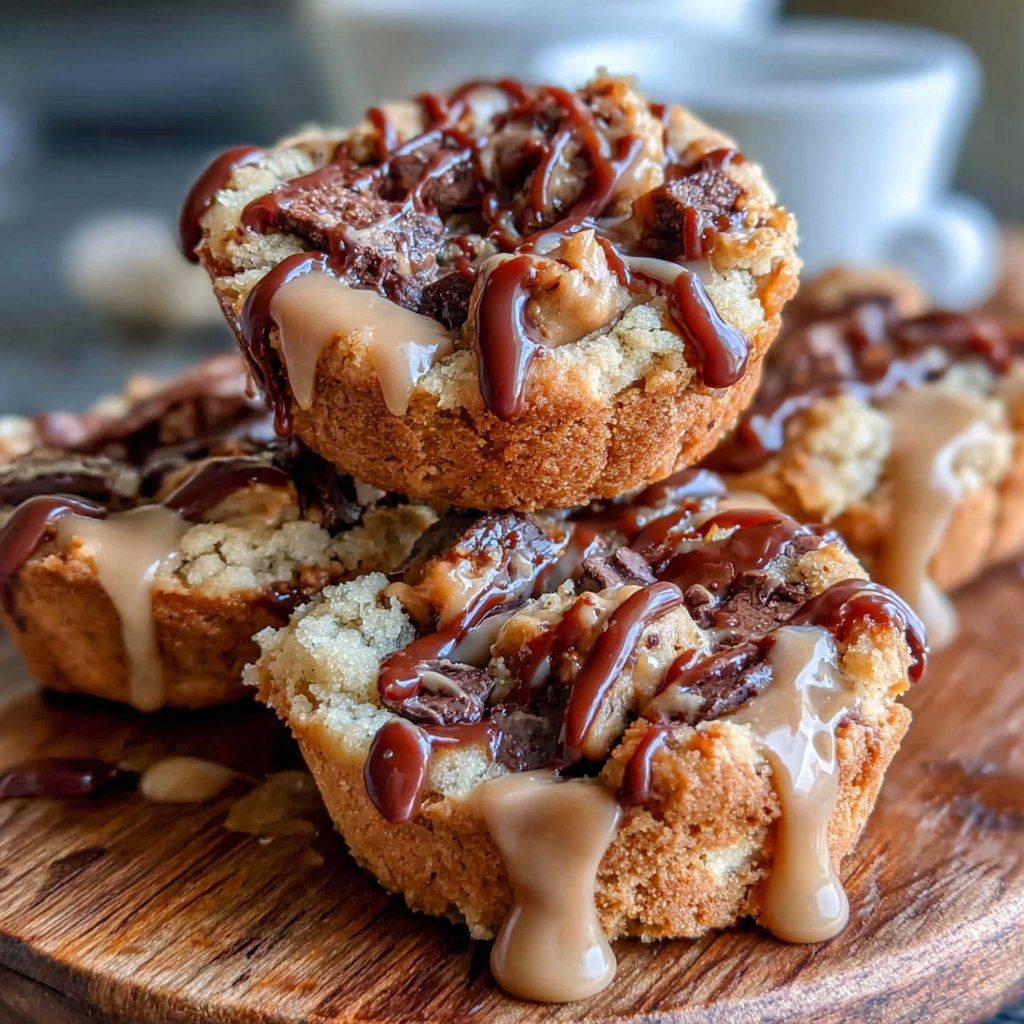
I love the moment when I take a bite of these Peanut Butter Brownie Cookie Cups. The combination of rich chocolate brownies and creamy peanut butter filling takes indulgence to the next level! Whenever I make these treats, they disappear in no time, leaving everyone craving more. Plus, they’re surprisingly easy to whip up, making them perfect for last-minute gatherings or simply satisfying a sweet tooth. Trust me, once you try them, you’ll want to make them a regular fixture in your baking rotation!
Every time I bake these Peanut Butter Brownie Cookie Cups, I am reminded of my childhood when I first discovered the magic of peanut butter and chocolate together. The flavor combination is timeless, and the way the brownie base complements the peanut butter filling is simply irresistible.
I’ve found that letting the brownie layer cool slightly before adding the peanut butter filling really helps in creating the perfect texture. This method not only enhances the flavors but also keeps the filling creamy and dreamy. I can’t wait for you to try them!
Why You Will Love This Recipe
- Rich chocolate flavor paired with creamy peanut butter
- Soft brownie texture contrasted with a luscious filling
- Perfect for sweet cravings or festive gatherings
Understanding the Ingredients
The key to achieving a rich flavor in these Peanut Butter Brownie Cookie Cups lies in using high-quality cocoa powder. When sifting it into your batter, ensure there are no lumps, as this will contribute to a smoother brownie base. I prefer a Dutch-processed cocoa for a deeper flavor, but you can also use natural cocoa if that’s what you have on hand. Just be mindful of the slight differences in taste and acidity.
The peanut butter filling is just as crucial for creating that perfect balance. I recommend using creamy peanut butter rather than chunky, which can alter the smooth texture you want. Also, use heavy cream in the filling for an ultra-rich and velvety mouthfeel. If you’re looking for a healthier alternative, try Greek yogurt as a substitute, though it may change the flavor profile slightly.
Mastering the Baking Process
When prepping the muffin tin, be generous with the grease to prevent sticking—nothing is more frustrating than a crumbly brownie that won’t release. I use a spray oil for an even coating, ensuring every nook is covered. Filling the cups halfway allows for a little rise without overflowing, which means cleaner edges and less cleanup later! Keep an eye on your brownies as they bake; you want them set at the edges but still soft in the center for that perfect chewy texture.
If you find your brownie cups puffing up too much while baking, gently press them down with the back of a spoon as soon as they come out of the oven. This helps create a deeper well for your peanut butter filling. Remember, each oven can be different, so use the toothpick test wisely—look for a few moist crumbs sticking when inserted in the center for the ideal doneness.
Serving and Storage Tips
For the best experience, serve these cookie cups chilled, as this enhances the creaminess of the peanut butter filling. They also make excellent snacks for parties if you prepare them a day in advance. Just store them in an airtight container in the refrigerator for up to a week. The flavors will meld beautifully, creating an even more indulgent treat. If you need to transport them, consider keeping them chilled in a cooler to maintain their shape.
Should you wish to freeze these delightful treats, they can be stored in a freezer-safe container for up to three months. Just remember to layer parchment paper between them to prevent sticking. When you’re ready to enjoy, let them thaw in the refrigerator for a couple of hours. You’ll still get that wonderful brownie texture and creamy filling that everyone loves!
Ingredients
Gather these ingredients to create the most delicious Peanut Butter Brownie Cookie Cups:
For the Brownie Base
- 1/2 cup unsalted butter, melted
- 1 cup granulated sugar
- 2 large eggs
- 1 teaspoon vanilla extract
- 1/3 cup unsweetened cocoa powder
- 1/2 cup all-purpose flour
- 1/4 teaspoon salt
For the Peanut Butter Filling
- 1/2 cup creamy peanut butter
- 1/4 cup powdered sugar
- 1/2 teaspoon vanilla extract
- 1/4 cup heavy cream
Make sure you have everything ready before you start baking!
Instructions
Follow these easy steps to create your Peanut Butter Brownie Cookie Cups:
Prepare the Brownie Mix
In a mixing bowl, combine melted butter and sugar until smooth. Add the eggs and vanilla extract, mixing well. Sift in the cocoa powder, flour, and salt, then stir until just combined.
Bake the Brownie Base
Preheat your oven to 350°F (175°C) and grease a muffin tin. Spoon the brownie batter into each muffin cup, filling about halfway. Bake for 12-15 minutes or until a toothpick inserted comes out with a few moist crumbs.
Prepare the Peanut Butter Filling
While the brownies bake, mix peanut butter, powdered sugar, vanilla extract, and heavy cream in a bowl until smooth and creamy.
Assemble the Cookie Cups
Once the brownie bases have cooled slightly, use a spoon to make a small indentation in the center of each cup. Fill with the peanut butter mixture, smoothing it out evenly.
Chill and Serve
Refrigerate the cookie cups for about 30 minutes to set the filling before enjoying. Serve chilled or at room temperature.
And there you have it! Delicious Peanut Butter Brownie Cookie Cups ready to be devoured.
Pro Tips
- For an extra touch, sprinkle some chopped peanuts on top of the filling before chilling for added crunch and flavor.
Troubleshooting Common Issues
If your brownie cups seem too dry or crumbly, you may have overmixed the batter after adding the flour. Mixing just until combined is key to keeping these treats moist. In future attempts, make sure to fold the dry ingredients gently and stop as soon as you don't see any flour streaks. Overbaking can also lead to dryness; always start checking a couple of minutes before the minimum recommended baking time.
Another common problem is the peanut butter filling being too thick after chilling. If that happens, try a quick whisk with a splash of cream to loosen it up before adding it to the wells. Alternatively, you can adjust the amount of powdered sugar in the filling for a sweeter or thicker consistency based on your preference.
Variety and Customization
Feeling adventurous? Try incorporating chocolate chips into the brownie batter for an even more decadent bite! You can use semi-sweet, dark, or even white chocolate chips for a fun twist. Mixing in some chopped nuts can add an attractive crunch to the texture. Just be careful not to overload the batter, as this can affect the cooking time and consistency.
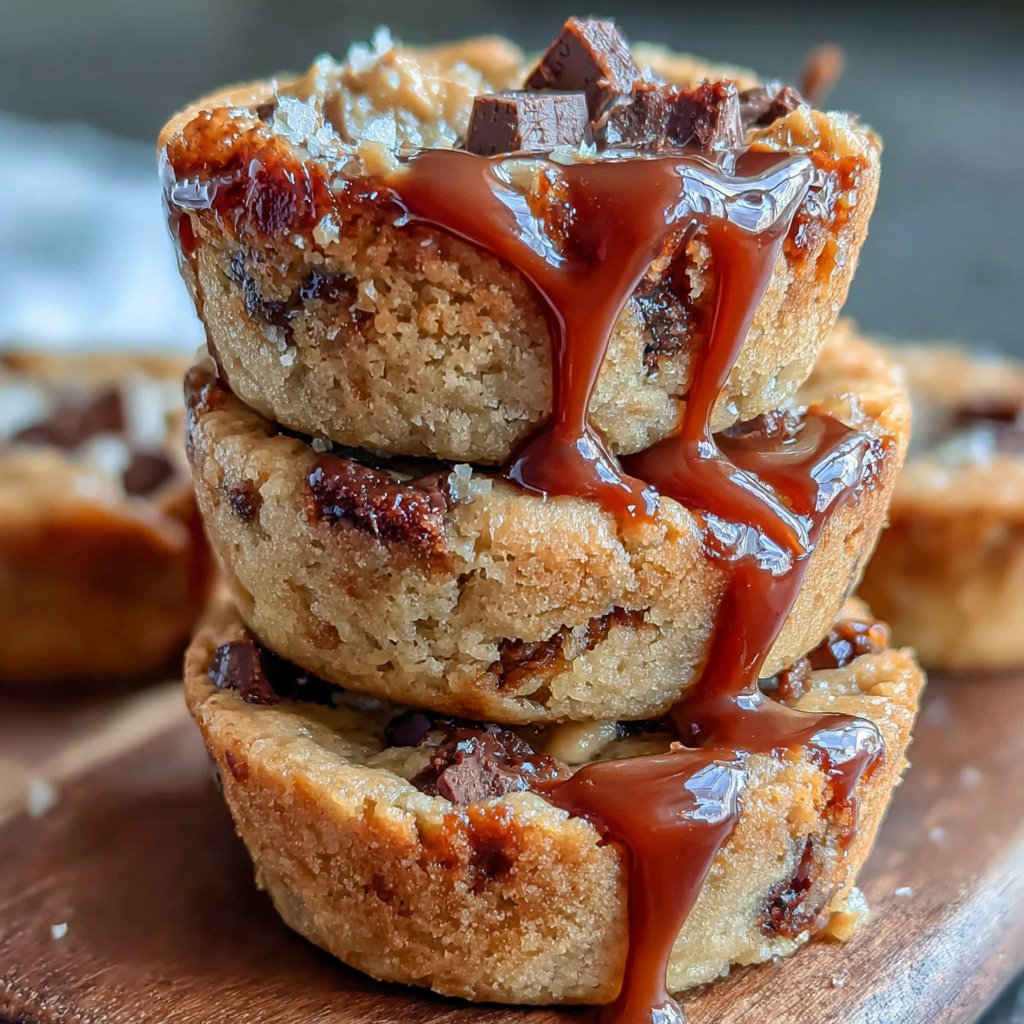
You can also change up the filling by adding ingredients like a sprinkle of sea salt on top for a salted caramel effect or swirled chocolate for extra sweetness. For a nut-free option, swap the peanut butter with an equal amount of sunflower seed butter or a similar nut-free alternative. These small changes can make each batch uniquely yours!
Questions About Recipes
→ Can I use crunchy peanut butter?
Yes, crunchy peanut butter can be used for added texture and taste!
→ How should I store the cookie cups?
Store them in an airtight container in the refrigerator for up to a week.
→ Can I make these gluten-free?
Absolutely! Substitute all-purpose flour with a gluten-free flour blend.
→ What if I don’t have heavy cream?
You can replace heavy cream with milk or a non-dairy alternative, but the texture may vary slightly.
Peanut Butter Brownie Cookie Cups
Created by: The Chefsamuelbakes Team
Recipe Type: Weekend Baking Recipes
Skill Level: Intermediate
Final Quantity: 12 cups
What You'll Need
For the Brownie Base
- 1/2 cup unsalted butter, melted
- 1 cup granulated sugar
- 2 large eggs
- 1 teaspoon vanilla extract
- 1/3 cup unsweetened cocoa powder
- 1/2 cup all-purpose flour
- 1/4 teaspoon salt
For the Peanut Butter Filling
- 1/2 cup creamy peanut butter
- 1/4 cup powdered sugar
- 1/2 teaspoon vanilla extract
- 1/4 cup heavy cream
How-To Steps
In a mixing bowl, combine melted butter and sugar until smooth. Add the eggs and vanilla extract, mixing well. Sift in the cocoa powder, flour, and salt, then stir until just combined.
Preheat your oven to 350°F (175°C) and grease a muffin tin. Spoon the brownie batter into each muffin cup, filling about halfway. Bake for 12-15 minutes or until a toothpick inserted comes out with a few moist crumbs.
While the brownies bake, mix peanut butter, powdered sugar, vanilla extract, and heavy cream in a bowl until smooth and creamy.
Once the brownie bases have cooled slightly, use a spoon to make a small indentation in the center of each cup. Fill with the peanut butter mixture, smoothing it out evenly.
Refrigerate the cookie cups for about 30 minutes to set the filling before enjoying. Serve chilled or at room temperature.
Extra Tips
- For an extra touch, sprinkle some chopped peanuts on top of the filling before chilling for added crunch and flavor.
Nutritional Breakdown (Per Serving)
- Calories: 380 kcal
- Total Fat: 26g
- Saturated Fat: 15g
- Cholesterol: 195mg
- Sodium: 85mg
- Total Carbohydrates: 32g
- Dietary Fiber: 3g
- Sugars: 24g
- Protein: 6g